
Changing Pages and Cover
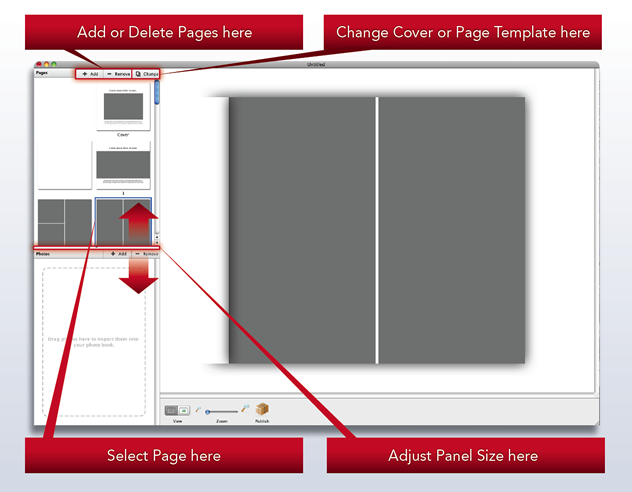
This diagram shows how pages are added and how page and cover templates are chosen. It also shows how the pages and photos panels can be altered in size.
Cover
To change your choice of cover highlight the cover in the pages panel (blue outline appears by clicking on it) and then click the “Change” button.
Pages
To change the page template highlight the page in the pages panel and click the “Change” button.
Adding or removing pages
The software will have 20 pages loaded when you open it. More can be added (or removed) up to a maximum of 70 pages by using the small + or – buttons on the top right hand corner of the pages panel. See “Add or Delete Pages” in the diagram. Books with less than 20 pages are not recommended as they are too thin for good binding and so the software will not allow the removal of pages if there are 20 or less.
Changing Panel Size
The photo and pages panels can be adjusted in size by sliding the middle bar up or down as shown.
Page Order
Pages are printed in the order that they are shown in the pages panel. Uneven numbered pages are on the right when the photobook is opened. Page 1 is on the right and is the first printed page. The page to the left of page 1 is the inside of the cover and it is blank. Page 2 and 3 are opposite each other with page 3, the uneven numbered one on the right. The pages carry on in this way throughout the book.